FPGA: Stereo depth with a Vitis HLS block on the TE0950
Overview
Same board as the last post. TE0950-03, Vitis 2024.2, bare-metal. One IMX219 is on J15. The other is the CR00240 on CRUVI HS1. The live view is still one 640×180 UDP frame. The left half is J15. The right half is the heatmap instead of the second camera.
Facing the lenses, J15 is on the left. In the stereo pair it is the other way round: CRUVI is the left camera and J15 is the right, because the matcher looks out from behind the two cameras.
The full 1920×1080 frames are written into DDR next to the small preview. depth_heatmap rectifies both of them from the calibration, matches the pair, and writes a 960×540 heatmap. The processor paints that into the right-hand tile.
J15 + CRUVI, 1920×1080 in DDR
  → HLS depth_heatmap
      rectify, alpha 0.6 maps
      2×2 to 960×540
      match, heatmap
  → right half of the 640×180 UDP frame
Calibration
The board is a checkerboard on an iPad. 9×6 inner corners, squares measured at 20 mm. I grab a full frame from each camera, OpenCV finds the corners, and I keep the pose only when both cameras see the board. Eight poses is the minimum the solver asks for. A few of them are below.
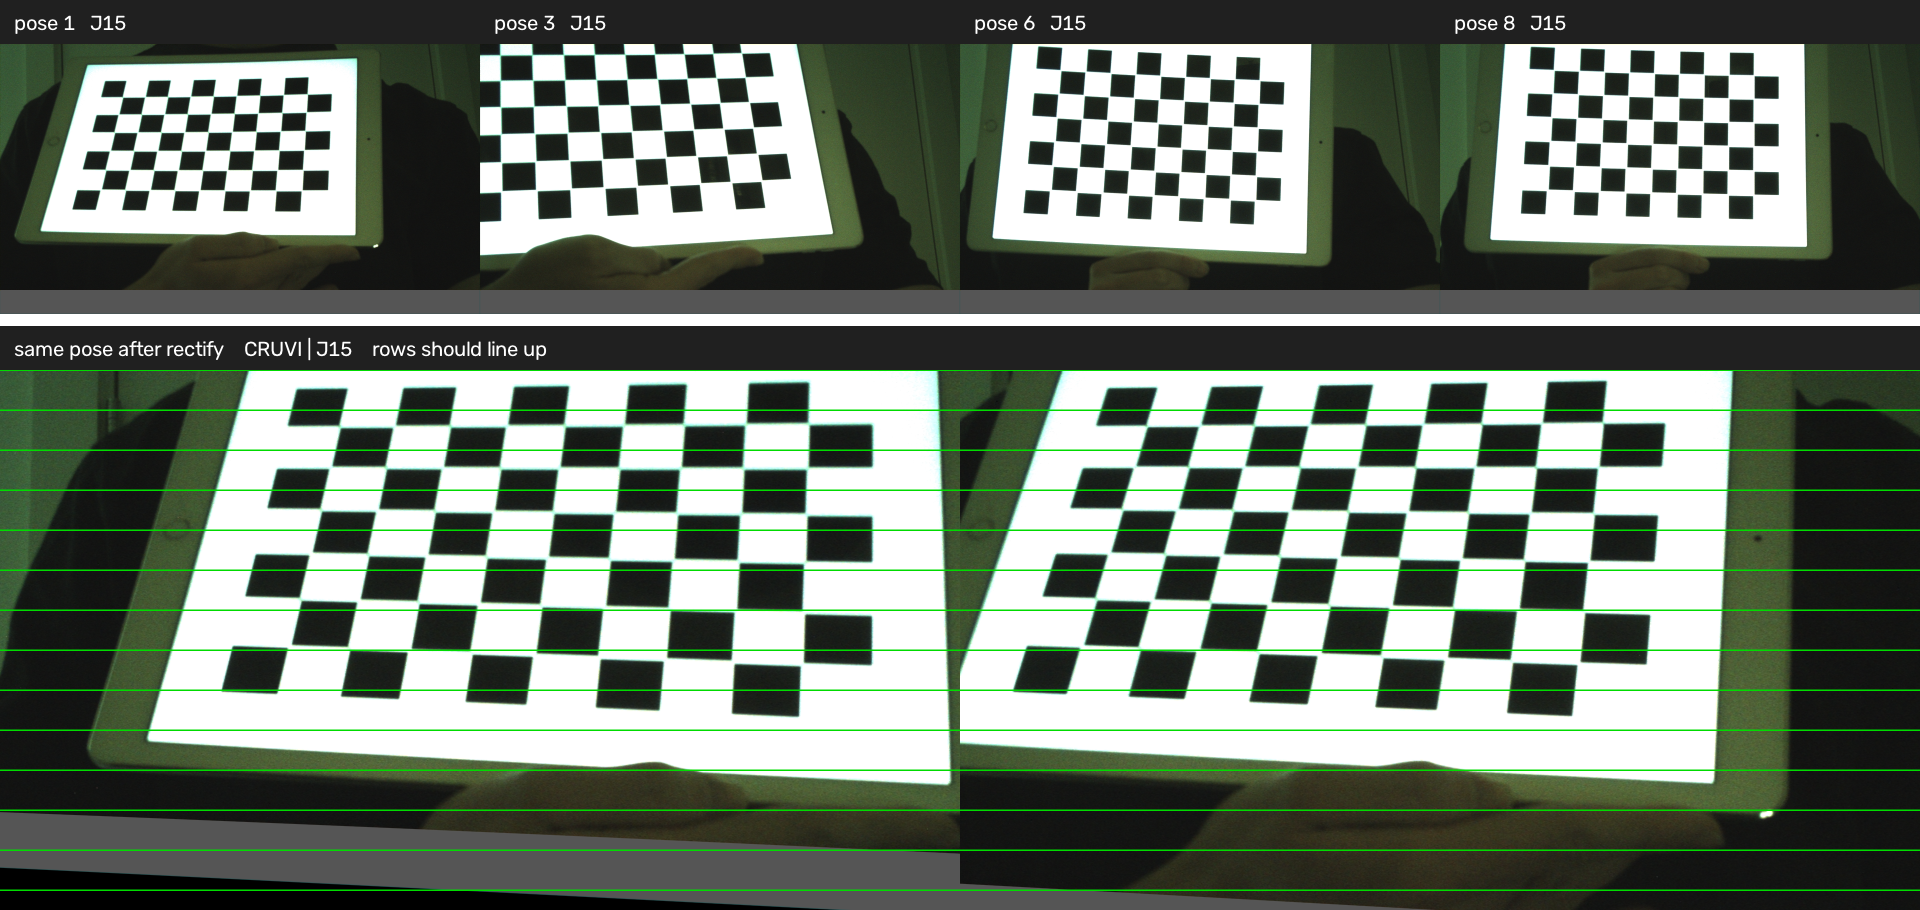
stereoCalibrate writes stereo.yaml. The reprojection error is about 3.9 px at 1920×1080. The baseline, the length of the translation between the cameras, is 60 mm. The bottom of that picture is the same pose after stereoRectify with alpha=0.6. The green lines are there so a corner on the left camera and the same corner on the right camera sit on one row. That row alignment is what lets the matcher search sideways instead of anywhere in the frame.
The two cameras sit 60 mm apart. Focal length is how far the lens sits from the sensor. A point in front of them lands on one column in the left picture and another column in the right. That shift is the disparity. Depth is the focal length times the baseline, divided by the disparity. A close point shifts a long way. A far point barely moves.
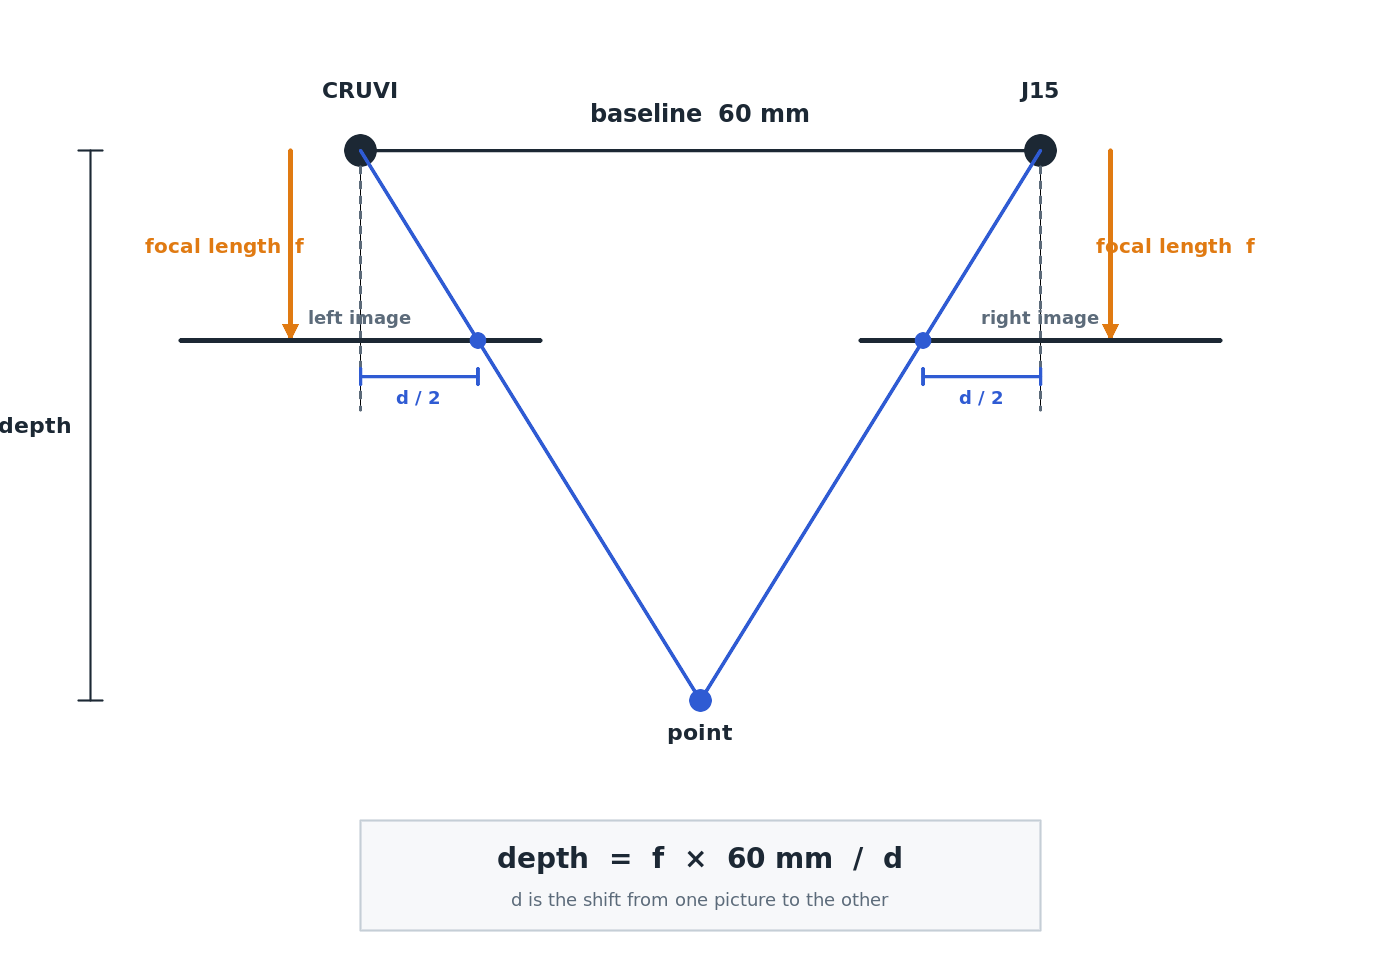
The yaml from the capture tool stores the alpha=0 rectify, which crops in hard. The control picture and the maps the block reads use alpha 0.6, so more of the frame survives.
An OpenCV picture to aim at
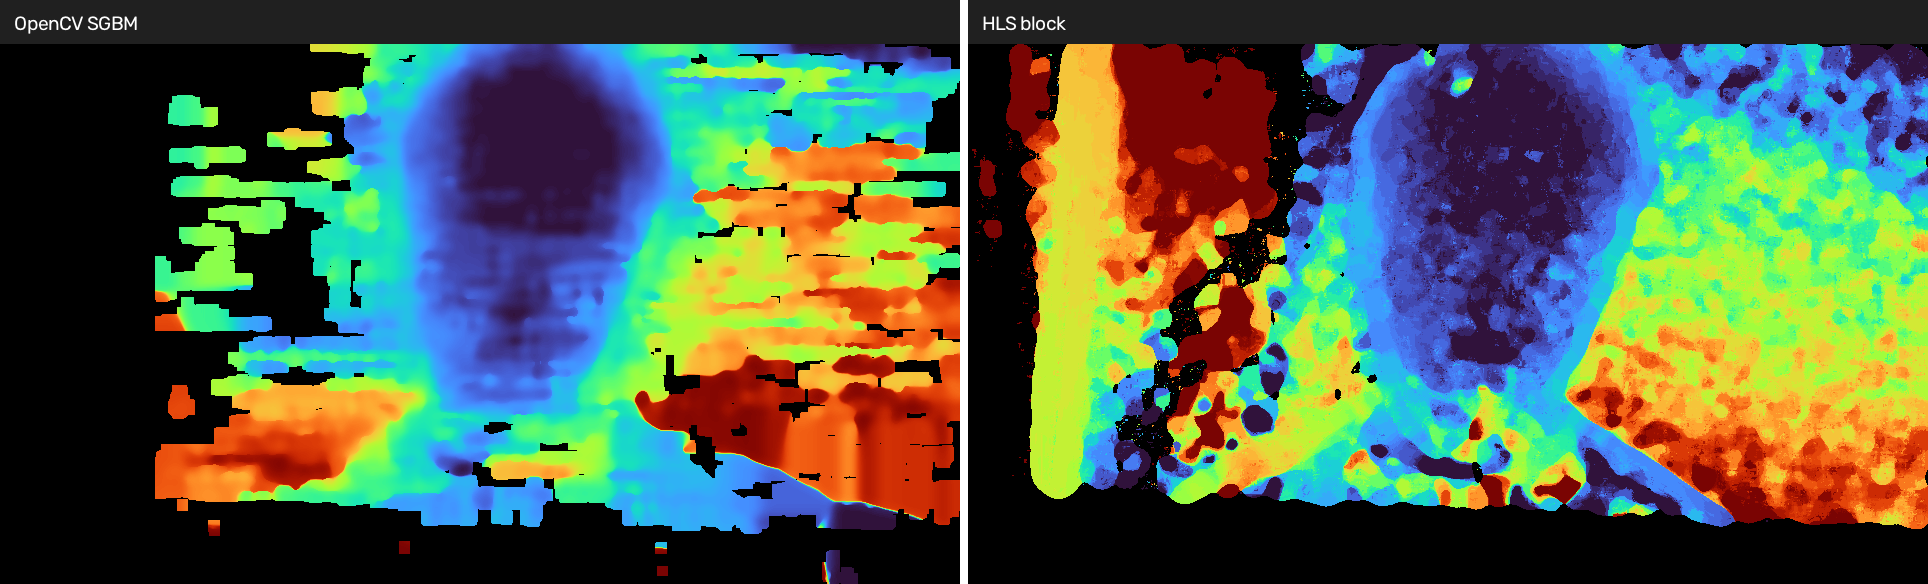
Before changing the HLS block I wanted one picture that already looked like a depth map. OpenCV rectifies the still the same way as the block, drops to 960×540, and runs StereoSGBM: a 7×7 window, 160 disparities, the 3-way mode. A median, an inpaint, and a bilateral filter clean it up, then COLORMAP_TURBO paints it. Near is blue. Far is red. Black did not match.
That picture is the control. The face should be one near colour and the door one far colour.
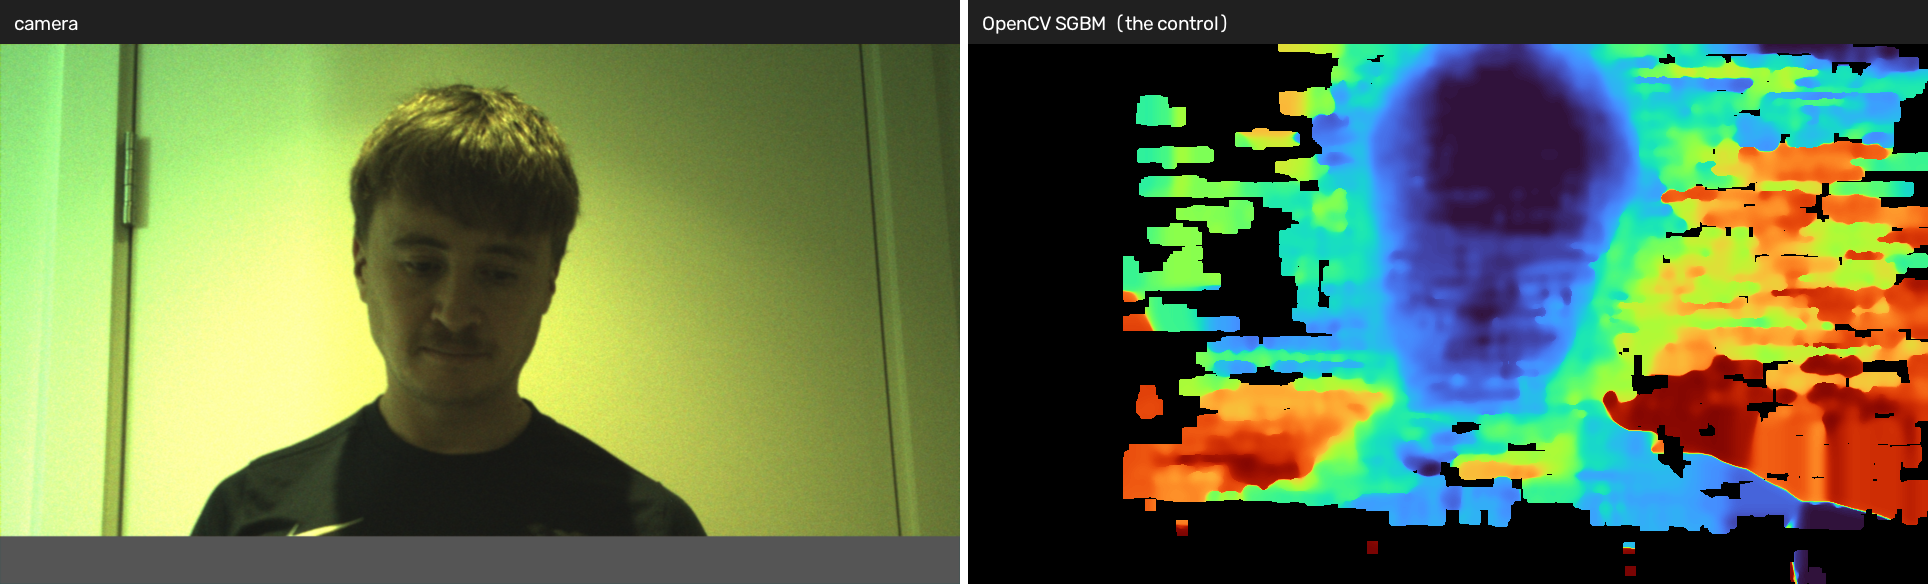
SGBM is happy to spend a long time on a PC. It is not what I wanted to put in the PL. It was the picture the HLS block had to land near.
The HLS block
The IP is depth_heatmap. Both frames and the calibration maps are in DDR. The block rectifies each camera with the alpha 0.6 maps. After that warp, a point on the left camera and the same point on the right sit on one row.
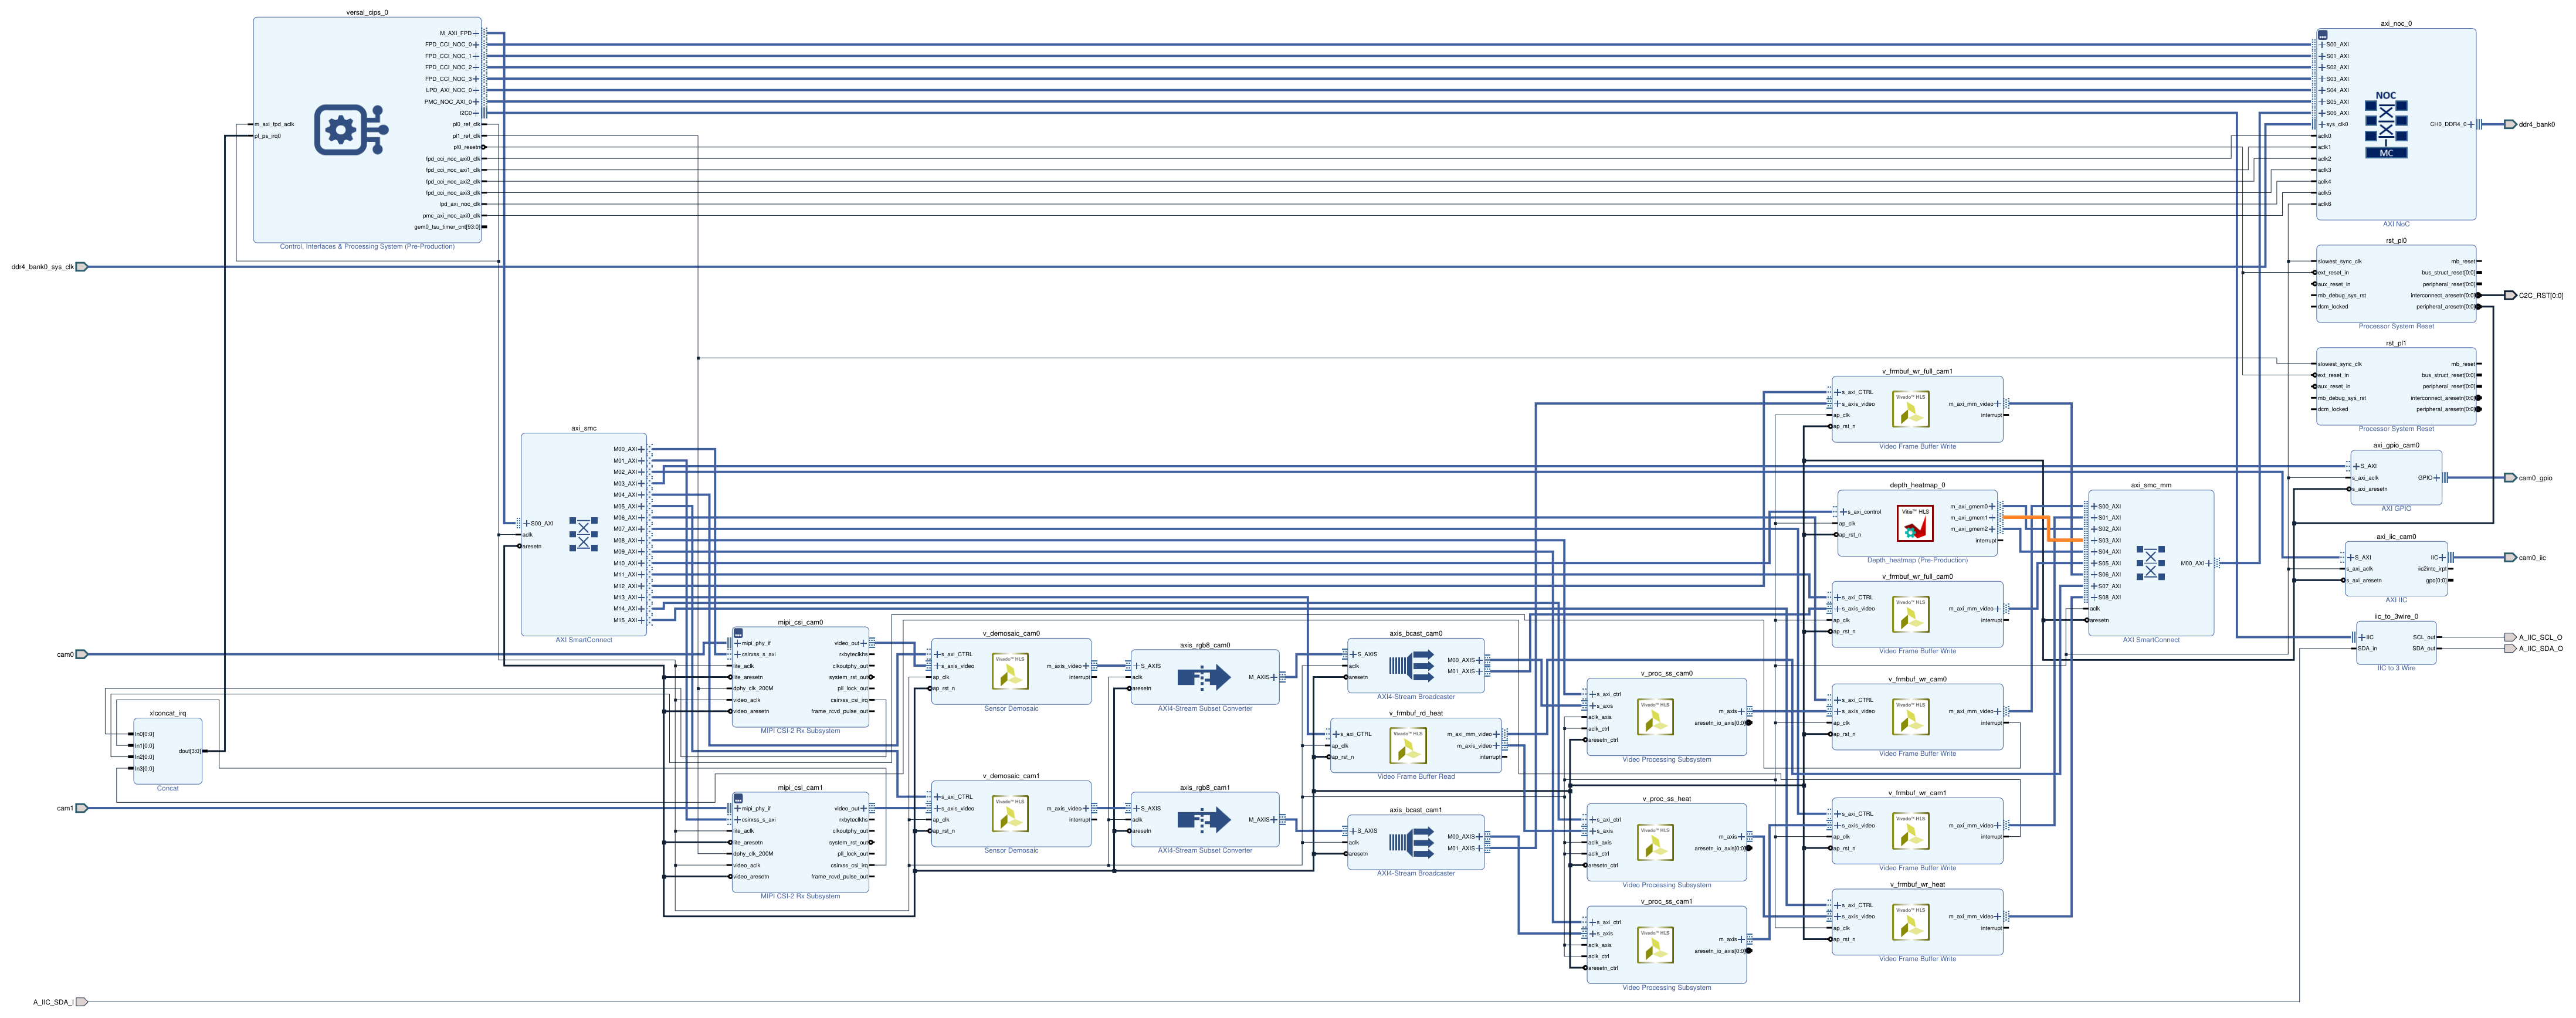
On the block design, depth_heatmap_0 hangs off the same register bus as the camera pipe. s_axi_control starts it. Three memory ports, m_axi_gmem0, m_axi_gmem1 and m_axi_gmem2, go through axi_smc_mm to DDR.
A 2×2 average then takes those rectified frames down to 960×540. The match is on grey. For each pixel a 7×7 window walks the other camera along the row, the cost is the sum of absolute differences, and winner-take-all keeps the disparity with the lowest cost. That search runs left to right and then right to left. The left-right check keeps a disparity only when the reverse search agrees within a couple of pixels. Two 15×15 median passes fill the holes that check leaves. A stretch paints the nearest of the surviving disparities blue and the farthest red.
I ran that C model on the same still as the OpenCV control and kept the version whose face and door landed in the same places. It is blotchier than SGBM. SGBM has a smoothness penalty along the row. This block does not, which is why the regions are speckled, but the layout is the same one.
The stages on that still, one under the next:
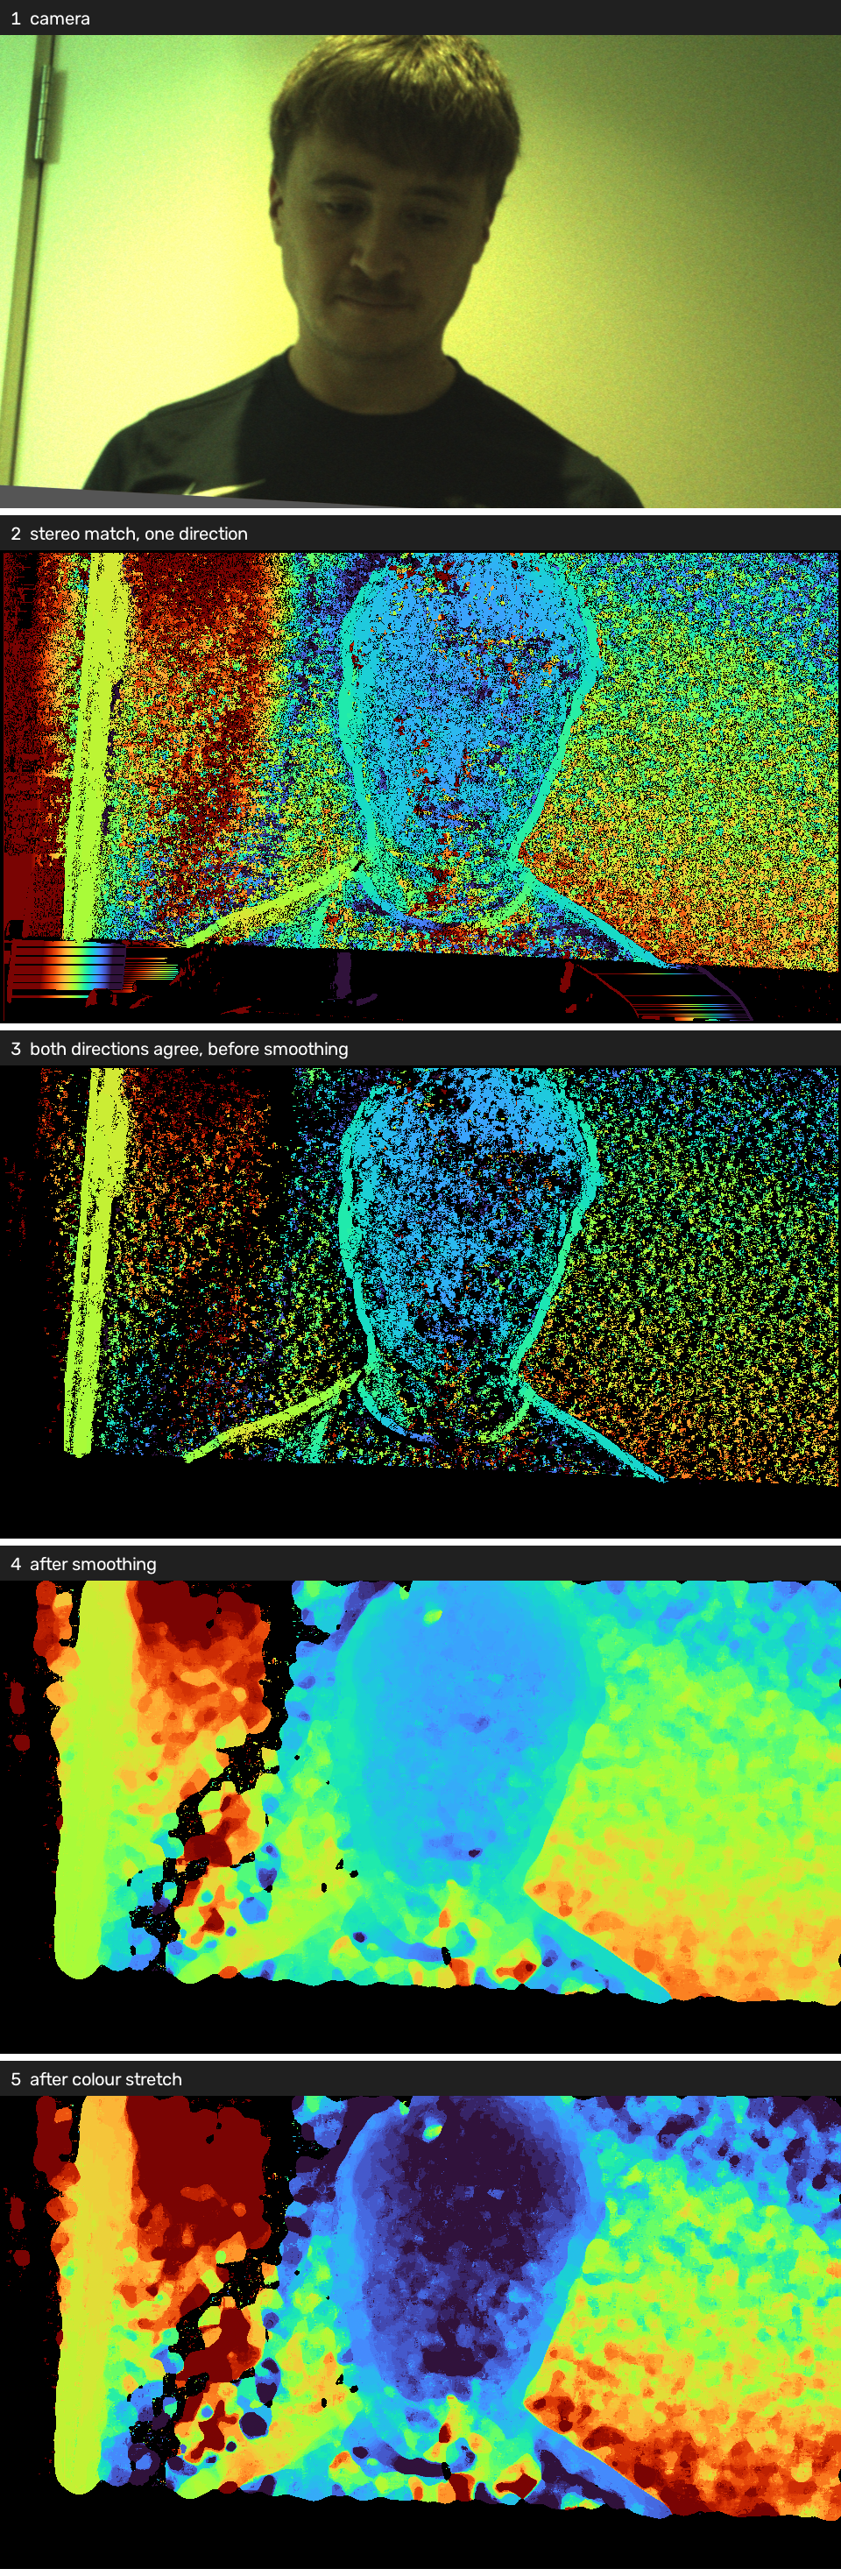
The one-direction row is already stereo. The right camera is the image being searched. It is just the left-to-right pass before the reverse check throws out the disagreements. Smoothing is what turns the speckle into regions. The last row is the stretch, which is the heatmap the block writes.
On a dark live frame the right half of the viewer turns into stripes. The IMX219 is a weak low-light sensor. Gain is already at 1× and the shutter is open for almost the whole frame, so a flat shirt is too flat for the 7×7 window. The still above is the same block once the face and the wall have light on them.
Acknowledgements
Thanks to Sundance for lending me the TE0950 board for this bring-up.