FPGAs : Working with DPU Part 2
Overview
This project is for the Xilinx 2025.2 toolchain. In this post I’ll describe how I created a PetaLinux project to run the DPUCZDX8G using the Vivado flow.
Step 1: Creating the PetaLinux project
First, source the PetaLinux settings script for the 2025.2 toolchain (<petalinux_folder>/settings.sh), then create the base project for the Ultra96-V2 DPU design:
petalinux-create --type project --template zynqMP --name ultra96v2_dpu
Step 2: Configure the project
Before configuring the PetaLinux project, make sure to copy your exported XSA file (named ultra96v2_dpu.xsa) into a convenient location.
Now change into your new project directory:
cd ultra96v2_dpu
To configure the hardware, pass your XSA file to the project:
petalinux-config --get-hw-description ../ultra96v2_dpu.xsa
Setting Serial and Filesystem
Next, configure the serial port settings to use UART1 and ensure that all relevant serial console options are set correctly for the Ultra96V2.
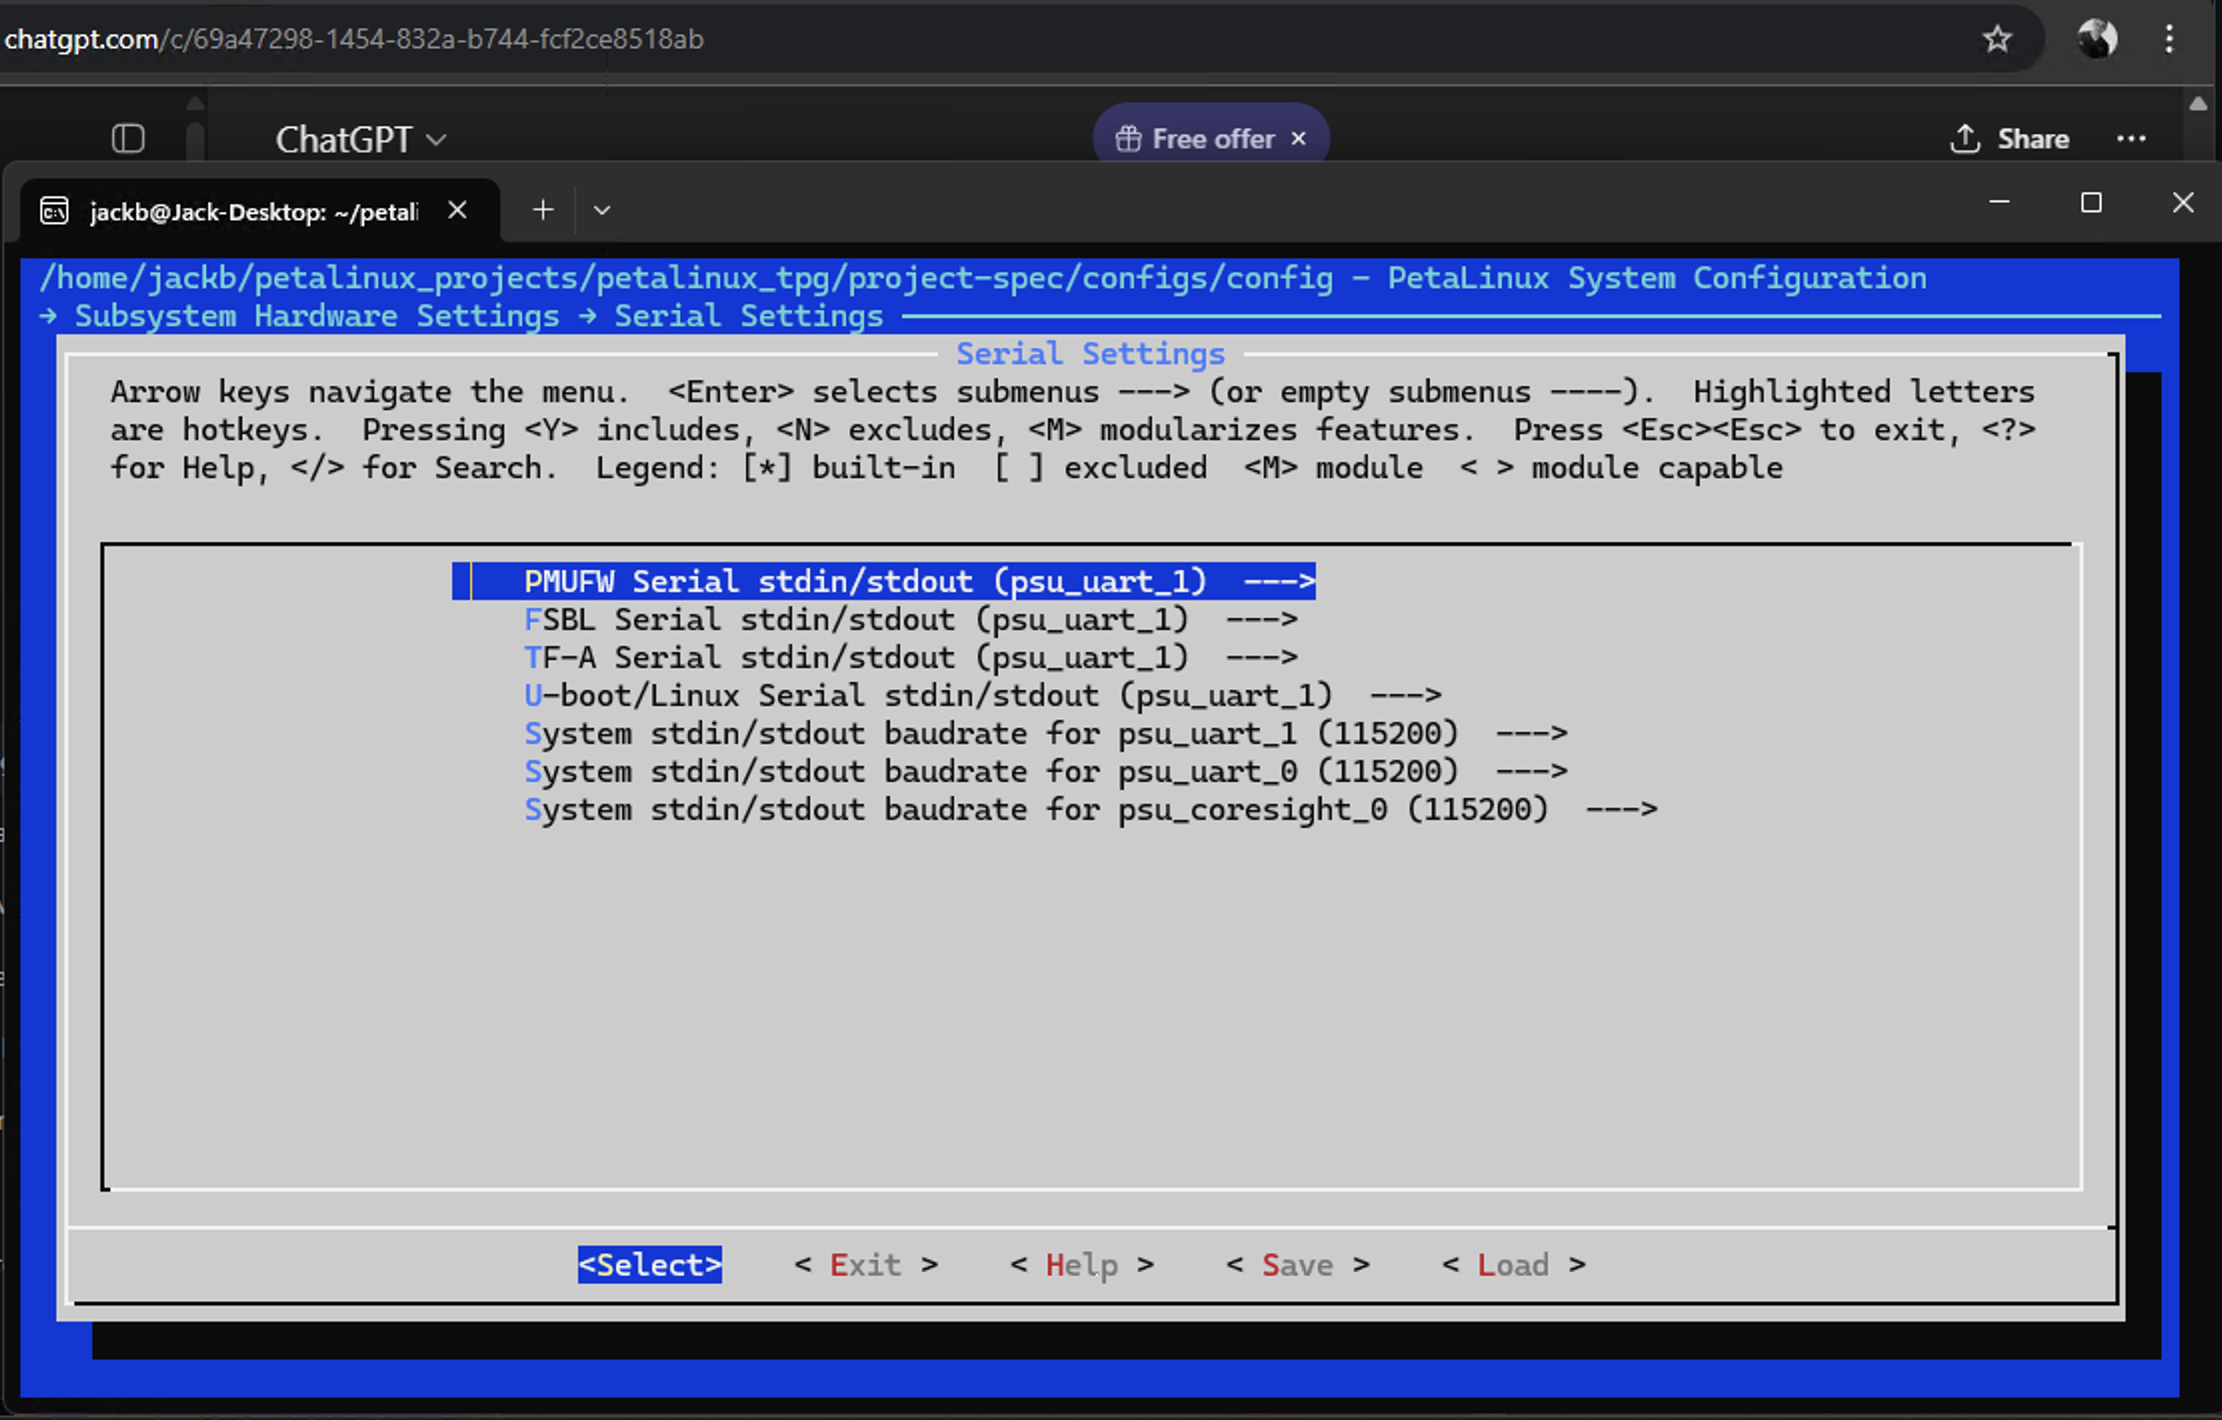
- Subsystem AUTO Hardware Settings → Serial Settings
Primary stdin:psu_uart_1Primary stdout:psu_uart_1Primary stderr:psu_uart_1Serial port:psu_uart_1
For filesystem configuration, select ext4 as the root filesystem type:
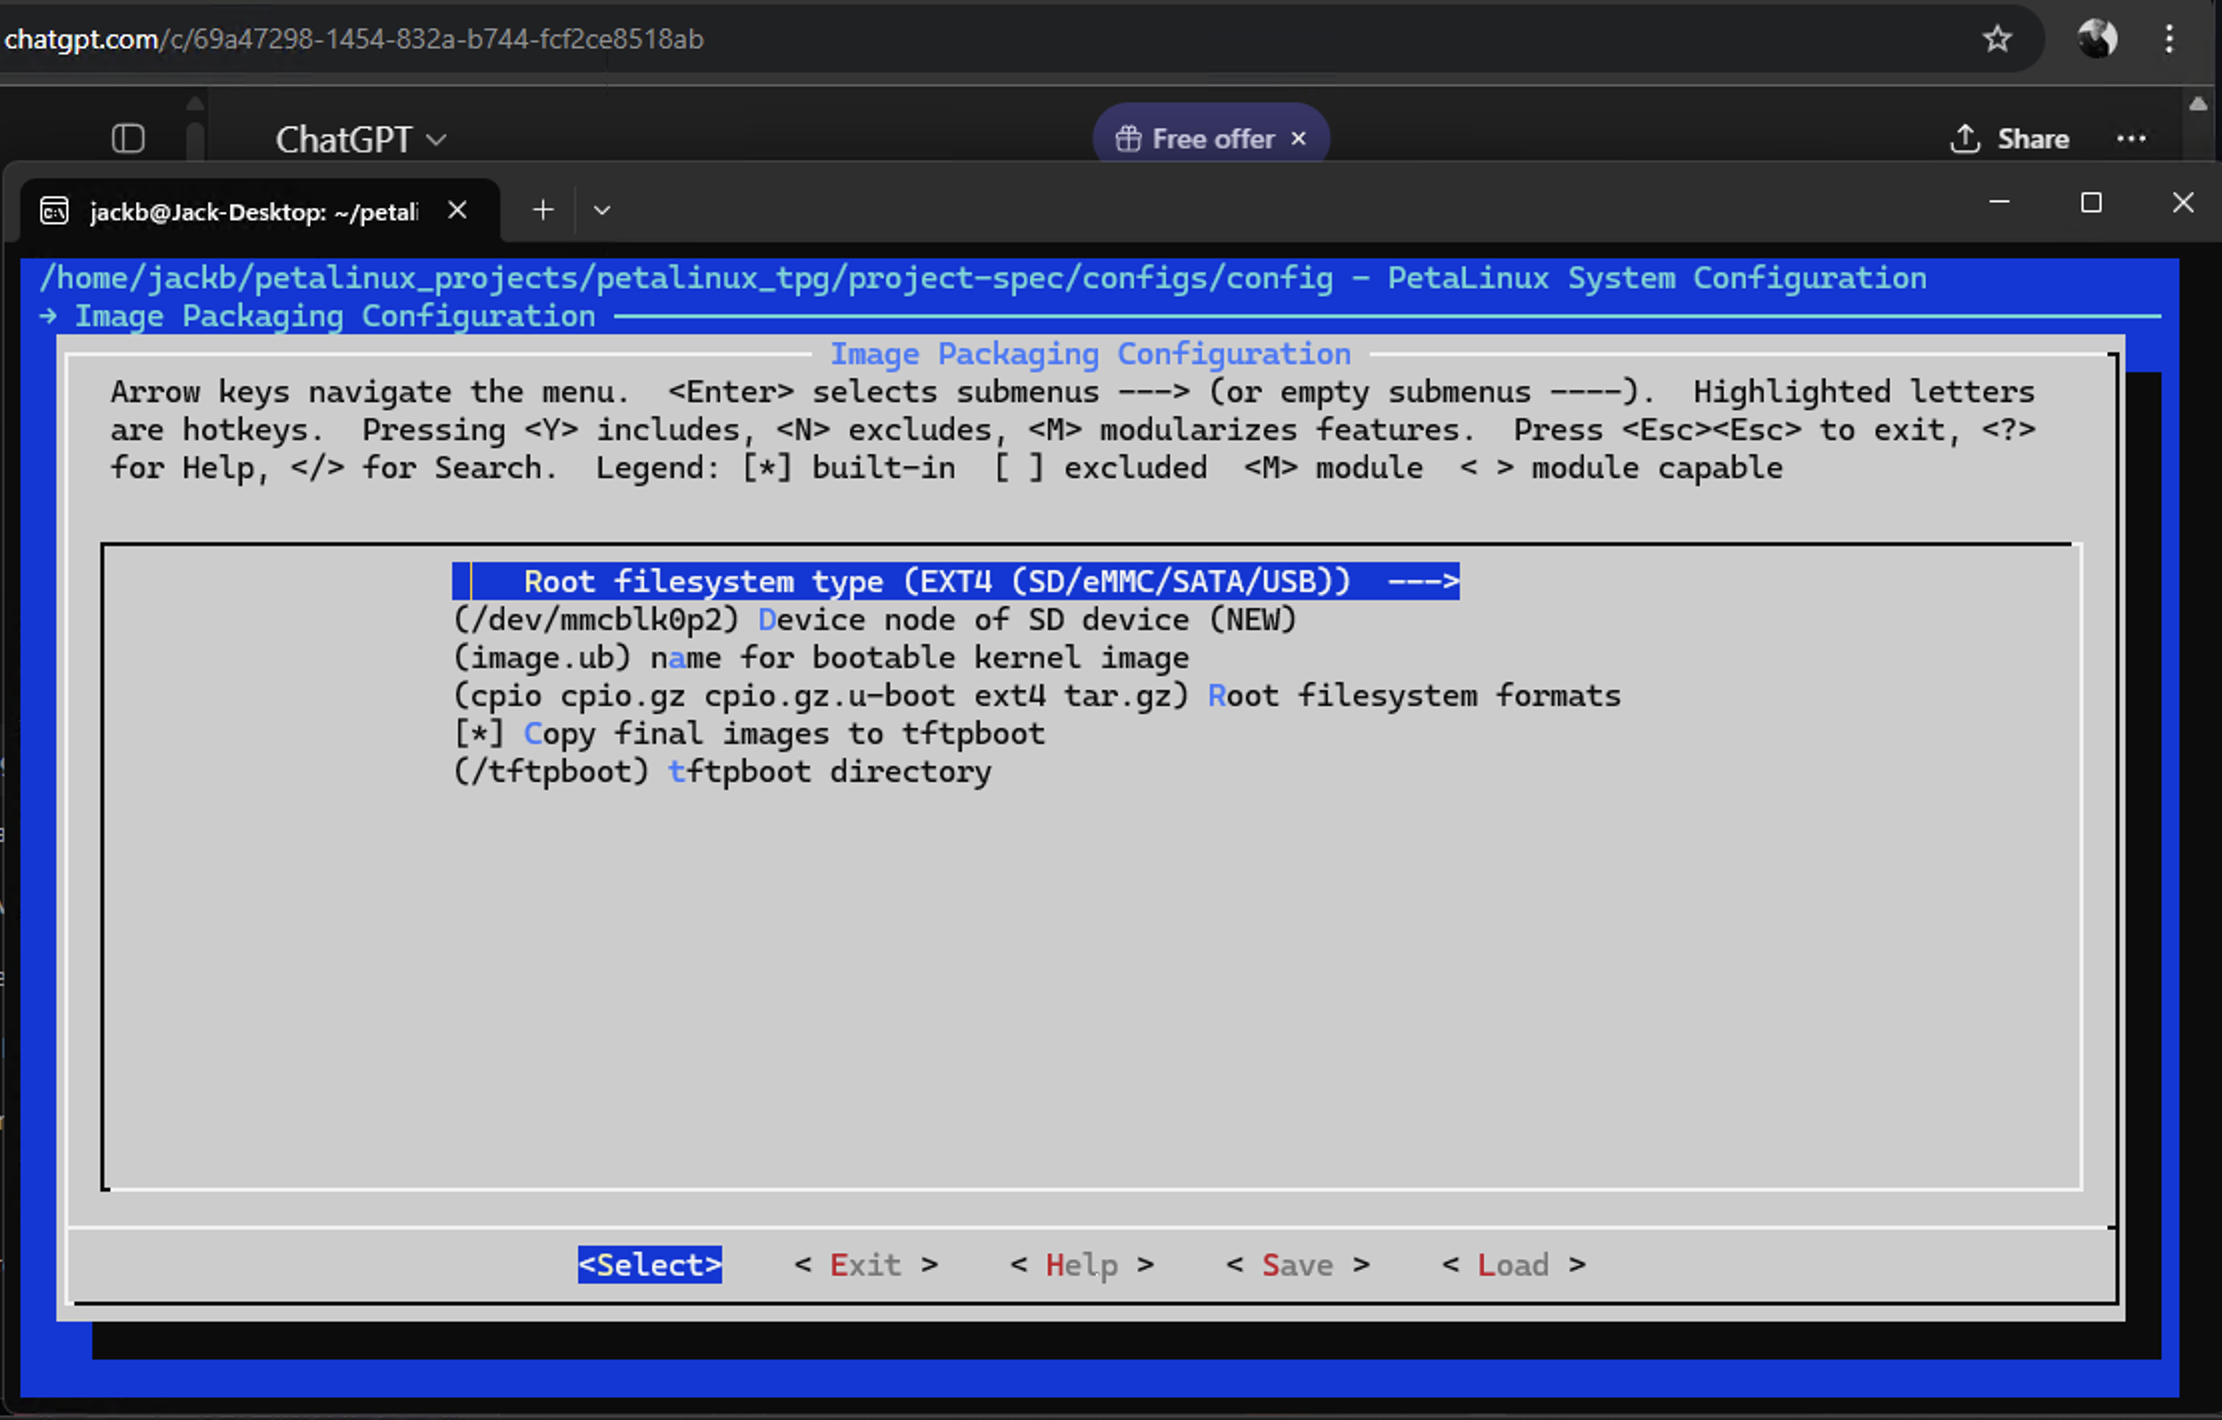
- Image Packaging Configuration → Root filesystem type
- Select:
ext4
- Select:
Device-tree: Set Machine Name
You will also want to set the machine name in the device tree settings to ensure compatibility with the Ultra96-V2 board.
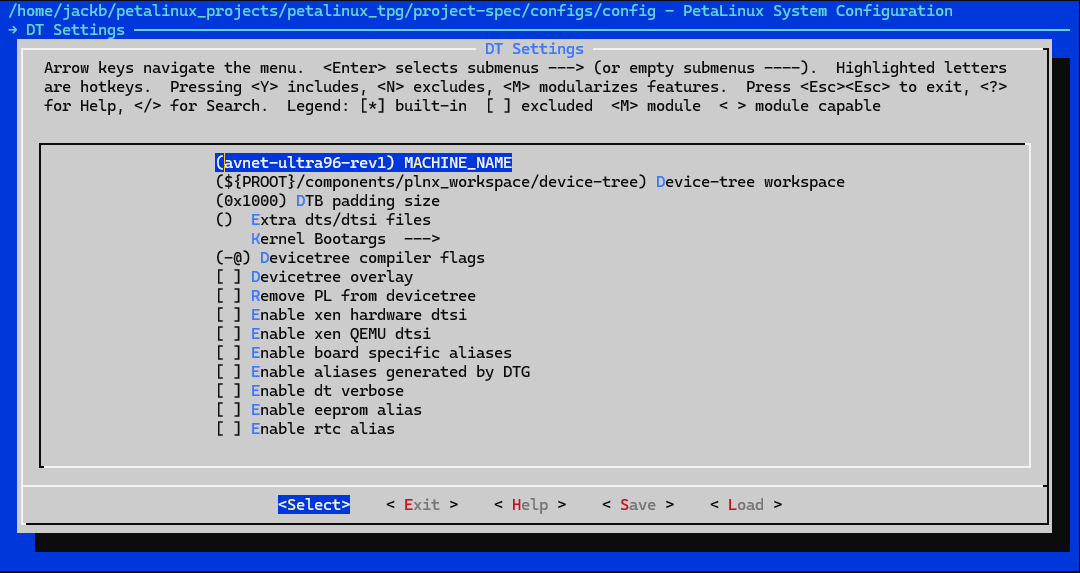
- DTG Settings → Machine Name
- Change this value to:
avnet-ultra96-rev1
- Change this value to:
Add meta-vitis Yocto layer
You can get this from AMD’s public GitHub repository: Xilinx/meta-vitis (rel-v2024.2) .
Then, in petalinux-config, add meta-vitis as a user layer:
- Yocto Settings → User Layers
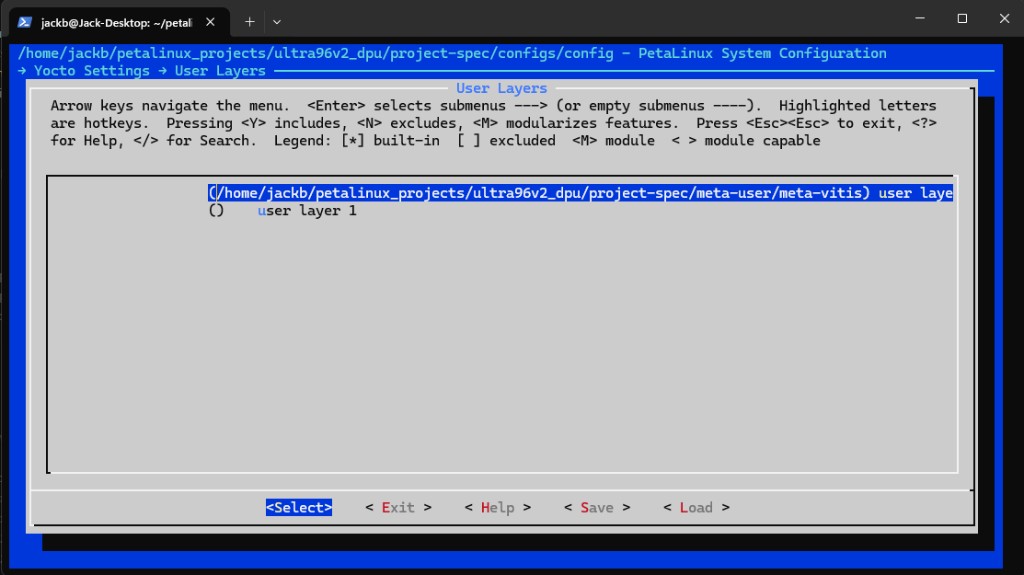
After adding the layer, open project-spec/meta-user/meta-vitis/recipes-vai/vart/vart_3.5.bb and ensure the following line is commented out:
# PACKAGECONFIG:append = " vitis"
Step 3: Add replacement recipes-vai
As a final preparation step before building, add the replacement recipes-vai
folder provided by AMD into project-spec/meta-user/ as well. (This part was referenced from LogicTronix’s hackster.io Project
)
Step 4: Update Kernel BSP
In your BSP layer under recipes-kernel/linux/linux-xlnx, make sure the kernel configuration enables enough CMA memory and the DPU driver:
CONFIG_CMA_SIZE_MBYTES=1024
CONFIG_XILINX_DPU=y
Step 5: Enable rootfs packages for Vitis AI and tooling
First, make sure the key packages are listed in project-spec/meta-user/conf/user-rootfsconfig so they are always selected when you run the rootfs config:
CONFIG_gpio-demo
CONFIG_peekpoke
CONFIG_packagegroup-vitisai
CONFIG_vart
CONFIG_xir
CONFIG_unilog
CONFIG_dnf
CONFIG_nfs-utils
CONFIG_resize-part
CONFIG_vitis-ai-library-dev
CONFIG_vitis-ai-library-dbg
Then, in the root filesystem configuration (petalinux-config -c rootfs), enable the following options to pull in the required system, Vitis AI, debugging and convenience packages:
CONFIG_system-zynqmp=y
CONFIG_dnf=y
CONFIG_e2fsprogs-mke2fs=y
CONFIG_fpga-manager-script=y
CONFIG_mtd-utils=y
CONFIG_can-utils=y
CONFIG_nfs-utils=y
CONFIG_pciutils=y
CONFIG_run-postinsts=y
CONFIG_libdfx=y
CONFIG_xrt=y
CONFIG_xrt-dev=y
CONFIG_xrt-dbg=y
CONFIG_zocl=y
CONFIG_zocl-dev=y
CONFIG_zocl-dbg=y
CONFIG_udev-extraconf=y
CONFIG_linux-xlnx-udev-rules=y
CONFIG_packagegroup-core-boot=y
CONFIG_tcf-agent=y
CONFIG_bridge-utils=y
CONFIG_dosfstools=y
CONFIG_resize-part=y
CONFIG_u-boot-tools=y
CONFIG_imagefeature-ssh-server-openssh=y
CONFIG_imagefeature-hwcodecs=y
CONFIG_imagefeature-package-management=y
CONFIG_imagefeature-empty-root-password=y
CONFIG_imagefeature-serial-autologin-root=y
CONFIG_Init-manager-systemd=y
CONFIG_packagegroup-vitisai=y
CONFIG_unilog=yk
CONFIG_vart=y
CONFIG_vitis-ai-library-dbg=y
CONFIG_vitis-ai-library-dev=y
CONFIG_xir=y
Step 6: Add DPU drivers
Clone the DPU driver repository directly into project-spec/meta-user/recipes-kernel/ so the recipes are picked up by the build.
Use: JackBonnellDevelopment/Xilinx_DPU_Driver
.
Step 7: Update the device tree for DPU
Before building, update the system-user.dtsi so that the DPU node in pl.dtsi is extended with the correct compatible string and properties. Replace the contents of project-spec/meta-user/recipes-bsp/device-tree/files/system-user.dtsi with:
/include/ "system-conf.dtsi"

/* Extend the auto-generated DPU node from pl.dtsi */
&dpuczdx8g_0 {
	compatible = "xlnx,dpuczdx8g-4.1", "xilinx,dpu";
	core-num = <1>;
};
This ensures the DPU kernel module can correctly bind to the DPU instance in your design.
Step 8: Build and package images
With the configuration and device tree updates complete, build the PetaLinux project and generate the boot files and WIC image (following the same flow described in the test-pattern-generator pipeline post):
petalinux-build
petalinux-package --boot --format BIN \
  --fsbl ./images/linux/zynqmp_fsbl.elf \
  --u-boot \
  --pmufw ./images/linux/pmufw.elf \
  --fpga \
  --dtb ./images/linux/system.dtb \
  --force
petalinux-package --wic --force
This will generate the full .wic image file, typically in images/linux/, suitable for direct writing to your SD card.
Step 9. Write the WIC Image to SD Card
Now that you have the .wic image, you can write it to your SD card using balenaEtcher
or a similar tool:
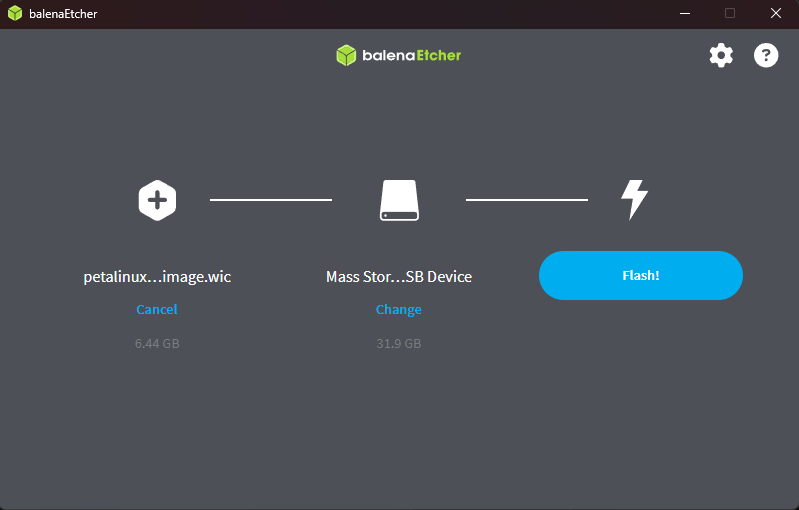
- Insert the SD card into your PC.
- Open balenaEtcher.
- Select the generated
.wicimage file (e.g.,images/linux/plnx-aarch64.wic). - Choose your SD card as the target.
- Click “Flash” to program the SD card.
After Etcher completes, safely eject the SD card and insert it into your Ultra96-V2 board to boot your new image.
Step 10: Verify the DPU is running
Once the board has booted, you can connect to the Linux console over serial (for example, using PuTTY on Windows):
- Open PuTTY and select the Serial connection type.
- Set the Serial line to the COM port used by your Ultra96-V2 (for example,
COM6).- Baud rate:
115200 - Data bits:
8 - Stop bits:
1 - Parity:
None - Flow control:
None
- Baud rate:
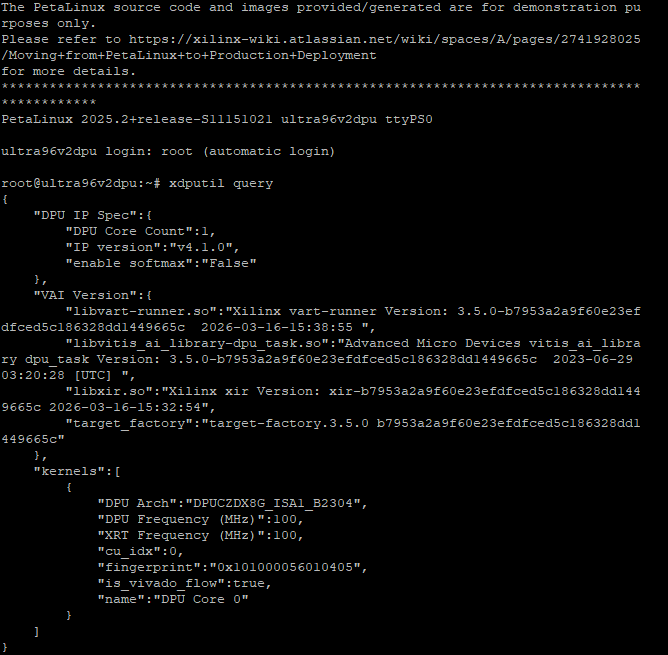
- Click Open, log in to the board, and run:
xdputil query
This should print out information about the DPU core, confirming that the accelerator is visible and configured correctly.